Red Wine Chocolate Cake

As I’ve mentioned before, I love having people over for dinner! I’m no expert dinner thrower though, as I usually need about an extra hour when I’m having a large group over. I did a chicken fried steak dinner for 10 friends recently, and if one of my friends hadn’t come over early there would have been no vegetable, and I had to completely scrap the gravy (usually the best part).

One problem though (and I’m sure most of you would not see this as a problem), is that I end up with extra wine. I’m not a wine drinker, so I never know what to do with it. When it is white wine, I sometimes make a risotto. When it is red wine, I might try a meat sauce that needs wine or make this red wine cake.

This is a really delicious cake that is easy to make and easy to clean up. The cake has a very strong wine, chocolate flavor, so the mascarpone cream sauce that accompanies it is crucial (and delicious). I recently discovered mascarpone when making some of giada’s mashed potatoes, and found it to be delicious. As the container informed me, it is just an Italian cream cheese. I even substituted it in a cream cheese icing recently, and it tasted great!

20130209-115839.jpg

So, next time you are looking for something to do with the left over red wine in your fridge, check out this recipe. I followed smitten kitchen’s recipe exactly, so I’ll just give you the link to her recipe and tempt you with my pictures.

Red Wine Cake

20130209-115718.jpg

20130209-115728.jpg

20130209-115737.jpg

20130209-115748.jpg

20130209-115800.jpg

Advertisement

Triple chocolate chocolate chip cookies

Oh how much has changed since a year ago. In Nashville, my exciting celebrity sightings included waiting in line at Starbucks behind Keith Urban and Nicole Kidman, going to a Colbie Callet concert and standing next to Hillary Scott and Taylor Swift, and catching glimpses of other country music stars around town. Now I run into different kinds of celebrities. A few months ago, I walked out of my office as George W. was walking down the hall. Earlier this week, I went to get a salad and the chief of staff of the army, general odierno, was towering behind me (he didn’t stay in the salad line when he saw the other options…), as his secret service milled around.

Not only have my celebrities changed, I have learned a great deal about an institution I knew basically nothing about: the army. As people will quickly remind me, West Point is not “the real army,” but when you are going from no information, you can say my knowledge has increased infinitely.

Since many of you also might not know much about the army, I’ll give you a little lesson here. To enter the army, a person can take two routes: enlist for a designated amount of time or commission as an officer. People going through ROTC or West Point are all commissioning as an officer when they graduate. People on the enlisted side can also become an officer by going through OCS (officer candidate school – I think that’s what it stands for).

To make things more confusing though, there are a few types of “officers” in the army. There are traditional officers, which are the commissioned officers that I mentioned before. Then there are non-commissioned officers (NCOs) which are on the enlisted side but are more experienced. THEN there are warrant officers, which are considered “experts” in a craft, such as aviation. Confused? Don’t worry… I’m still figuring it all out.

What hasn’t changed in the past year, is my favorite chocolate chip cookie. I got this recipe from a Nashville blog before I left, and it has quickly become my go-to chocolate chip cookie. It uses self rising flour which both saves some time because it doesn’t need baking soda or baking powder and it leads to a super fluffy cookie instead of the flat chocolate chip cookies I used to make.

I made this batch for one of the NCOs that works in my office who just got accepted to warrant officer training school to become an aviation warrant officer. Quite exciting and pretty cool too.

Triple Chocolate, Chocolate Chip Cookies
Slightly adapted from The Ultimate Southern Cookie by Mary Carter

Preheat oven to 350
Mix together:
1 cup softened butter
1 cup white sugar
1 cup brown sugar

Gently mix in:
2 eggs, slightly beaten
1 tsp. vanilla
1/2 tsp. sea salt, heaping

Fold in (in a couple rounds):
2 1/2 cup self-rising flour (I don’t use self-rising flour much, so I keep it in the freezer)

Finally, fold in:
3/4 cup dark chocolate
3/4 cup semi-sweet chocolate
3/4 cup milk chocolate

Scoop onto parchment lined cookie sheet in desired sizes. Sprinkle on some additiona sea salt. Bake for 8-12 minutes, depending on the size of the cookie. Sometimes I do huge cookies and sometimes I do mini ones, both are equally as good as long as you take them out when they are slightly browning.

Enjoy!!

20130209-113157.jpg

20130209-113221.jpg

Chelsea Market!

I’ve never been too keen on NYC. Before last summer, I had visited a few times and always enjoyed it, but for some reason it was never a place I wanted to live or really visit except to see friends. Just over a year ago, I began applying for jobs. In my mind, I wanted to live in a large city no further north than DC. I even crossed places off the list just because they were in NYC, but there were a few schools north of DC that managed to stay on.

Interviews came around and my first one lined up was with Colgate. I had been practicing my answer to “how would you like to live in Maine since you’ve spent all of your time in the south?” Sure enough that question came up, and I bombed it. Truth was, I didn’t want to live in the north, no matter how much I practiced being enthusiastic about it.

After first and second round interviews came job offers. I had two that I was really interest in: one in dc and one in New York. The first one met all of my qualifications: a job I would love in a city I already loved. The second one: small town, north of dc, and with the closest city being NYC. Never one to take the easy route, I chose the second job.

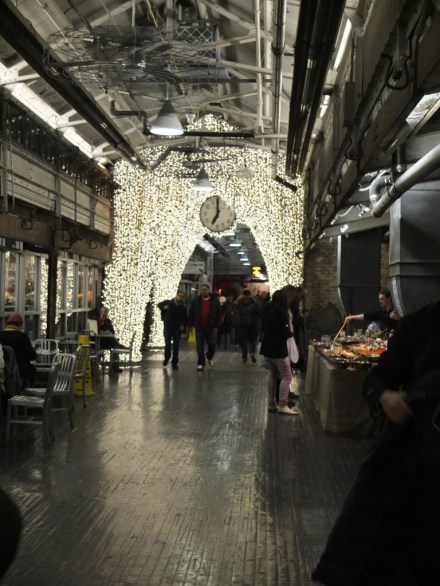
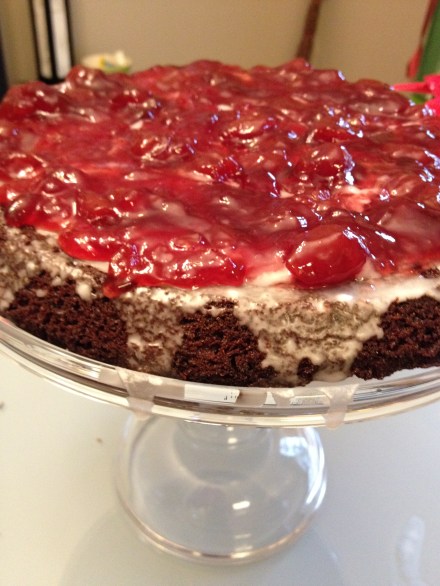
All of that is a long winded way of saying that having long been a skeptic of the city and having no plans to ever end up in this area, I am now a huge fan of NYC. It is awesome! I’ve barely explored it, but I’ve come to realize it has so much to offer! Last weekend (and the subject of this post), I went to Chelsea Market. If you live near the city or are planning a trip to NYC and you love food, I recommend checking this place out! (I am currently on the train to the city to visit another market -eataly – and take a mozarella class – more on that in another post.)

At the entrance, there is an anthropologie. Right there, you know that the place can’t be too bad. Once you enter though, you pass a bunch of restaurants, mini food shops, bakeries, kitchen stores, and so much more!

My favorite place, which unfortunately I don’t have any pictures of was the filling station. It is this little shop that sells flavored salts, olive oils, and balsamic vinegars. The best salt was the truffle salt by far, and if I didn’t have a bunch of new flavored salts at my apartment, I would have bought some right then. Diana and I tried pretty much all of the vinegars. The strangest was cinnamon pear. Who knew that would be a balsamic vinegar? My favorite was the cherry flavored one.

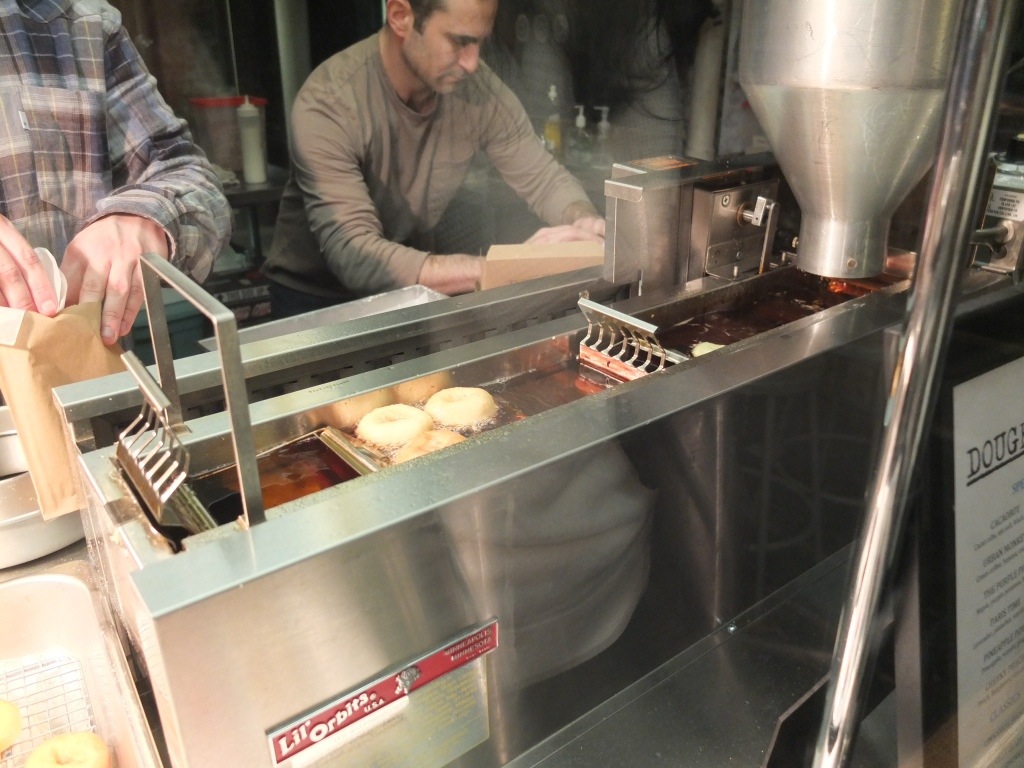
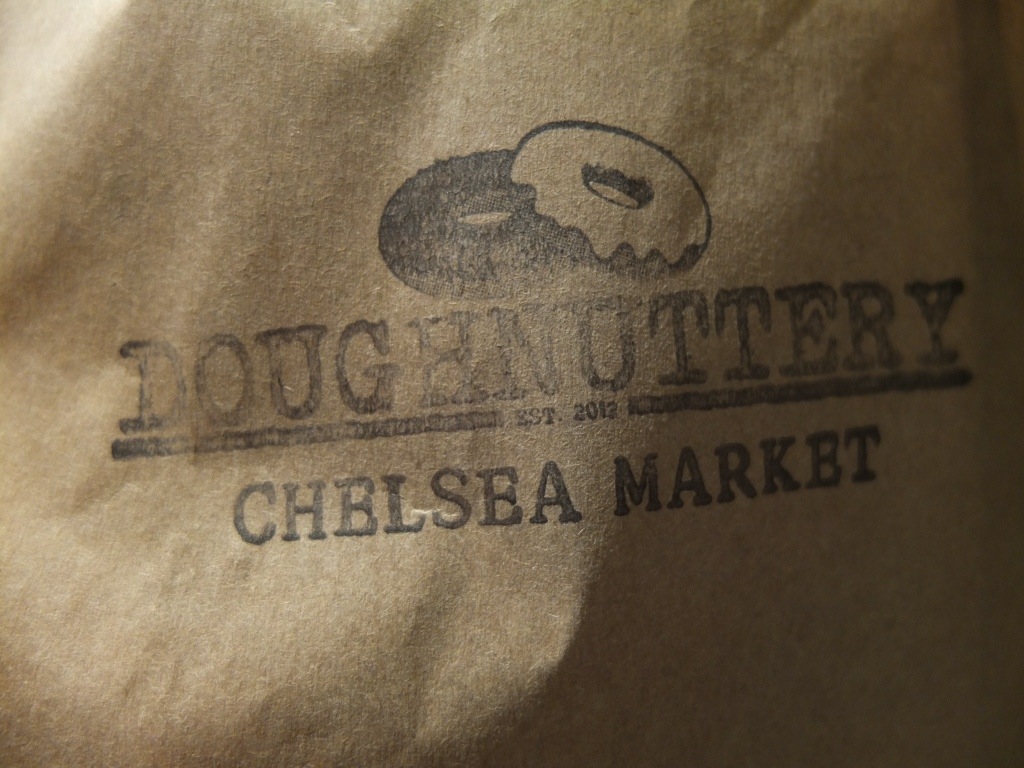
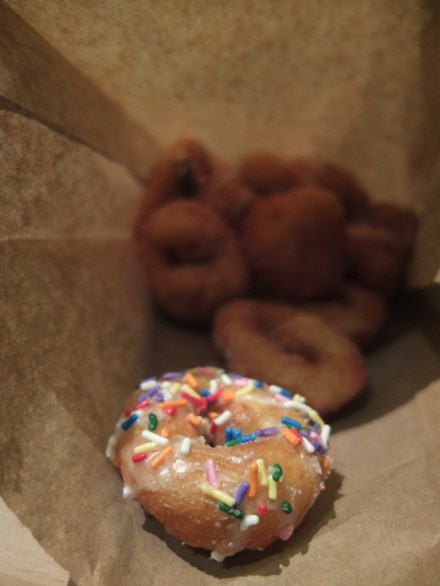
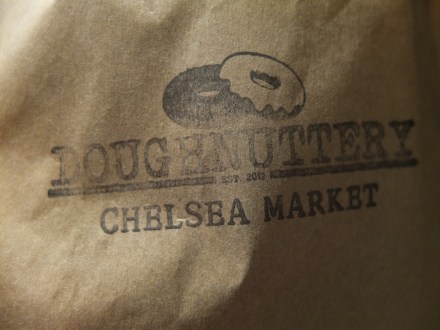
Next we went to the miniature doughnut shop. If you’ve ever been to a Krispy Kreme, this place will make you laugh. The doughnut maker is a tiny model of the one they have in the stores. They are just missing the “hot now” sign. You can ask for all sorts of favors with strawberry and sprinkles being my choice, of course. We picked up a dozen or so for the bday party we were going to, and they were quickly gobbled up.

20130202-115637.jpg

20130202-115648.jpg

20130202-115655.jpg

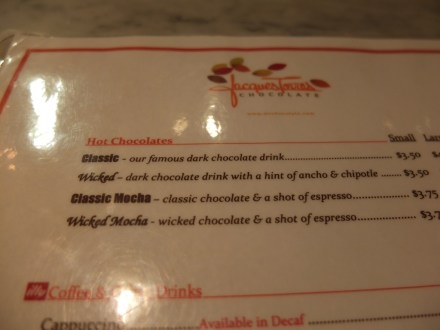
Next stop: hot chocolate. Seeing as the temperature outside was sub 30 degrees, this was an obvious choice. I’ve always heard that chilies in chocolate are awesome, but I’ve never actually tried it. In an adventurous mood, we got the wicked hot chocolate to sip on as we did more exploring.

20130202-120410.jpg

20130202-120417.jpg

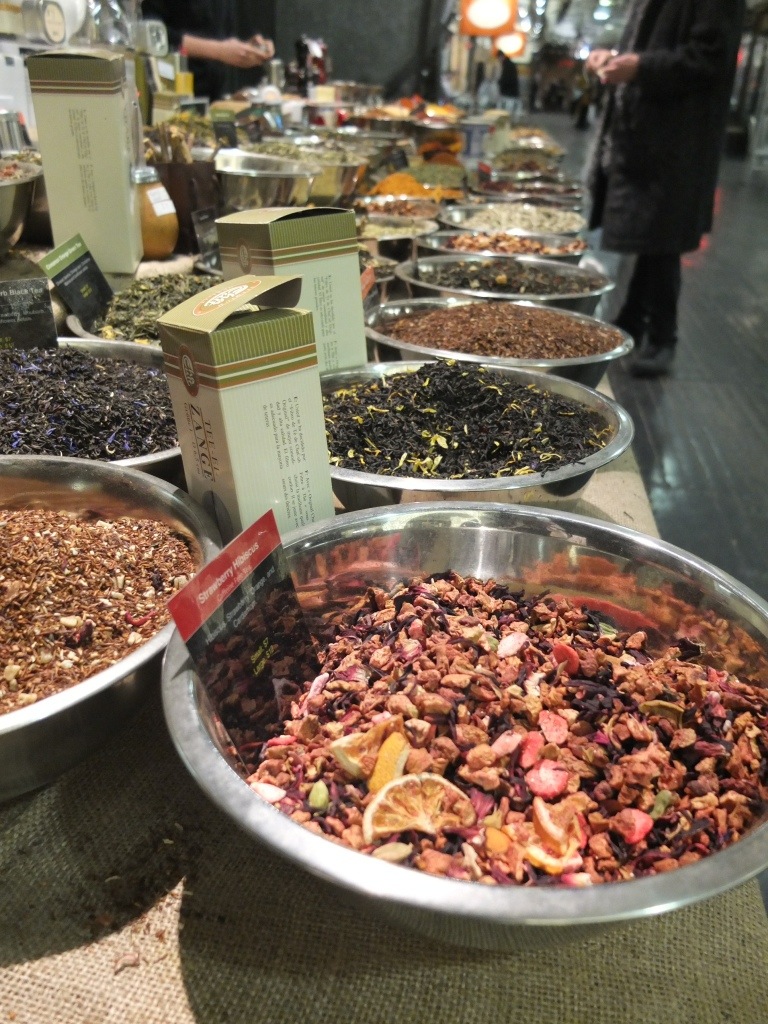
Finally, I’ll tell you about the tea/spice shop. I drink tea every day. Well, many times a day. Mainly English breakfast tea, but I’m trying to branch out. This place had any kind of tea imaginable and all made by the guy behind the table. Also, if you were looking for any time of spice combination (think: guacamole spices), they had that too. I ultimately settled on a strawberry tea that I’m going to have to break out this week.

20130202-120254.jpg

Ok, this post is long enough. Moral of the story: NYC is a pretty cool place, and I recommend Chelsea market.

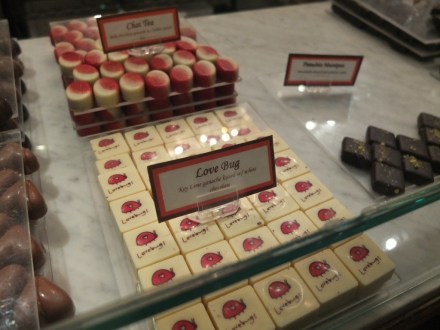
I’ll leave you with this fun fact: the New York state insect is the lady bug.

20130202-115812.jpg

I’m back!

Hello! Sorry I have become so delinquent with posting. I just found an ap for my iPad that will allow me to post pictures, so I am hoping I will start posting more again! I end up taking the train into the city most weekends, so it will be the perfect time to share the latest with you.  Since it has been so long, I thought I would just post an update with some of the things I’ve made since I moved to New York and mainly recently.

For labor day fireworks at west point, I made some ice cream sandwiches from the smitten kitchen blog. I picked up some cake batter ice cream from one of the five ice cream shops in my little town to give it a little bit of a different twist. smitten kitchen ice cream sandwiches

20130126-161911.jpg

Izzy loved them:

20130126-165428.jpg

I found an awesome grocery store just 20 minutes from me (everything is 20 to 30 min. away), and they have the best fruit in the summer! I went on a blueberry kick and made a bunch of blueberry yumminess, including these blueberry crumb bars, again from smitten kitchen.

20130126-162353.jpg

After hosting dinner parties at least once a month in Nashville (if not more), by November I had made enough friends to have one in new york! One of the desserts I served was a cranberry apple pie from cooks illustrated.

20130126-162747.jpg

20130126-162757.jpg

20130126-162809.jpg

In December, my good friends Raven and Joe hosted a holiday mad men party. In honor of the theme, I made a Christmas jello mold. One person tried it at the party. I took it into work and it took almost a week for it to disappear (which is impressive given that most things put down in the lounge are gone in less than 15 min). I guess jello isn’t so popular anymore.

20130126-163149.jpg

If you are looking for a delicious but easy dessert, try a molten chocolate cake. The recipe called for 13 minutes in the oven. I’d recommend reducing that to 12… Just to increase the gooeyness. molten chocolate cake

20130126-163424.jpg

20130126-163436.jpg

20130126-163445.jpg

Finally, while not meant to be a dessert, I thought I would share that I recently competed in another food competition. As you may remember, the last time I entered one, I lost miserably. (See my blog post on it.) This one ended in the same result. Maybe the third time will be the charm. I made a lemon, strawberry pizza. It was supposed to have fresh basil, but I bought bay leaves by accident…

20130126-164212.jpg

The winner made a pear, Gorgonzola, walnut pizza:

20130126-164315.jpg

Pumpkin Dessert Squares

Originally posted November 18, 2011

Confession: Every time I go to the mall I stop by Williams-Sonoma with rarely any intention of buying anything.  I am there for the sample of the day.  This particular sample is my favorite.  A layer of pumpkin between a cake bottom and a crumb top makes for a particularly gooey and delicious bite.

I had completely forgotten about this recipe until I stopped by the store the other day and they had some fresh out of the oven.  When I came home the other night in the mood to bake, I knew this is what I wanted.

While W-S would love for you to use their Pecan Pumpkin Butter… I’m here to tell you that it does not matter.  I used Trader Joe’s pumpkin butter and it works just as well.  For the crumb topping, use your favorite fall spices.  I added a little all-spice (which is a combination of cinnamon, nutmeg, and cloves) to the teaspoon of cinnamon the recipe calls for.  Also, I had a “Butter Recipe Golden” cake mix on hand, rather than a yellow cake mix, and it worked equally as well.

This recipe is super simple, and the only annoying part is that you will have to wash three bowls, one for each layer.

Pumpkin Butter Dessert Squares
(adapted from Williams-Sonoma Recipe)

Preheat oven to 350 degrees.

Bottom Layer
Yellow (or butter recipe) cake mix (remove 1 cup for topping)
1/2 cup butter, melted
1 large egg

Pumpkin Layer
13.5 oz. pumpkin butter (any brand will do)
2 egg
2 Tbsp. milk

Crumb Layer
1 cup cake mix
1 Tbsp. flour
1/4 cup sugar
1/4 cup butter
1 tsp. cinnamon
1/2 tsp. all-spice (or nutmeg or cloves or more cinnamon)

In separate bowls, mix together ingredients for each layer.  In a greased 9×13 pan, layer with cake, then pumpkin, then crumb topping.  Bake in 350 degree oven for 35-40 minutes.

Pumpkin Puree

Originally posted October 24, 2011

Homemade Pumpkin Puree!  Easier than pumpkin pie!
I’m never going back to canned pumpkin again, and I recommend that you test it out.

I’ve already made pumpkin bread, and I plan on making pumpkin smoothies, pumpkin cupcakes, pumpkin soup, pumpkin…  I’m out of ideas – please let me know if you have any!

I don’t have any good stories for this blog post – I’ll blame that on the fact that I’ve been spending too many hours re-writing my job market paper and writing cover letters.

Here are the steps for pureeing pumpkin!

Get some pie pumpkins.

Pre-heat the oven to 350 degrees.  Slice up one pumpkin and remove the seeds.


Place slices on a cookie sheet.  Bake for 45 minutes.


Allow to cool, and then peel the skin off of each slice.


Put in a food processor and blend!


You are done!  (You can also drain using a strainer or a cheesecloth, but I didn’t see much difference after I drained the pumpkin for an hour).

Pumpkin Cupcakes

Originally posted October 31, 2011

Happy Halloween!!!!

I didn’t dress up or carve any jack-o-lanterns this year, but I did enjoy plenty of pumpkin. I made these pumpkin cupcakes for school today and also because yesterday was a beautiful Sunday!  Most of the blogs I have seen used browned butter icing, so I thought I would use the same.  It adds a nice twist and an extra flavor to the pumpkin cupcake.

This recipe is adapted from a pumpkin square recipe that my friend’s mom gave me (thanks to Becca and her mom!).

I’m glad I got plenty of pumpkins before the holiday snuck up because apparently the grocery stores are all out!

Trick-or-treaters: I bought pumpkin shaped reeses, so feel free to come by my house!

Pumpkin Cupcakes
Adapted from Nancy Thomason’s Pumpkin Squares

Cake Ingredients
4 Eggs
1 2/3 cups sugar
1 cup cooking oil
1 16 oz. canned pumpkin (or 2 cups fresh pumpkin)
2 cups all purpose flour
2 tsp. baking powder
1 tsp. cinnamon
1 tsp. allspice
1 tea salt
1 tea baking soda

In a mixing bowl, beat together eggs, sugar, oil and pumpkin until light and fluffy.  Stir together flour, baking powder, cinnamon, salt and baking soda.  Add to pumpkin mixture and mix thoroughly.

Add batter to paper lined cupcake pans.  Bake for 15-20 minutes, depending on the size you are baking.

Cream Cheese Icing Ingredients

1 8oz. pk. Cream cheese
½ cup butter, browned
1 tea vanilla
3 ½ cups sifted powdered sugar

Brown butter in a skillet.  The butter will give off a nutty aroma and start to bubble and brown.  Allow butter to cool.  Beat together cream cheese and butter.  Mix in sugar and vanilla.

Color with food coloring if desired.

Add to cooled cupcakes.

Gooey Mint Cookies

Originally Posted December 17, 2011

I’ll admit that sometimes I can be a baking snob.  When I first made a version of these cookies, I turned my nose up at them.  They were too easy – what’s the fun in that?  Then I ate one… another… another …  I lost track of how many I ate.  The next day at school, they got rave reviews.  I went from being above them to being a huge fan.

After making them for the first time (and thinking about them for a while afterward), I decided I want to try them with a mint flavor.  My original idea was to add peppermint extract to the dough instead of vanilla.  Then I ran across some mint chips on display at the end of the aisle at the grocery store and settled with them. (Hey!  One of my classmates studies the effect of end of the aisle displays – here is an application.)

Mint chocolate chips are excellent.  I definitely tested a few before throwing them into the batter.  They add a nice twist to the chocolate cookie, and I bet would be good thrown into some brownies as well.  The mint flavor is similar to a Thin Mint, but these are incredibly soft cookies, as opposed to the crispy nature of the Girl Scout version.

Gooey Mint Cookies
Adapted from “Gooey Chocolate Cookies” by Pete and Denay
1 (8oz) cream cheese, softened
1/2 cup butter
1 egg
1 tsp. vanilla
1 pkg. chocolate cake mix – whatever kind you find on sale
Hershey’s Mint Chocolate Chips

Beat cream cheese and butter until light and fluffy.
Beat in egg and vanilla.
Add cake mix and mix well. Add chocolate chips.
Dough will be sticky. Cover and refrigerate for 2 hours.  (oops, I forgot this step.)
Form balls and bake at 350 for 9-11 minutes.

Chocolate Brownies with a Touch of Sea Salt

Originally Posted June 25, 2011

Nashville is an amazing place to live.  Not only do you run into Keith Urban and Nicole Kidman at Starbucks, but you hear can hear the best live music for very cheap (and sometimes free).

The Station Inn is apparently the most famous place to hear bluegrass music.  You would never know it by its appearance.  Across the street from fancy new condos and hip restaurants, it is a run down building that looks abandoned.   Last Saturday night, we went to see “Off the Wagon” play their last performance with their banjo player, Blake.  Blake is famous, and the band will truly miss him.

Ok, I’m not sure if Blake is famous, but I know him!  As a thank you to him and his wife, Katie, for getting us in and saving a couple of tables, I made them these brownies.  Katie loves Lindt Excellence “A Touch of Sea Salt” Dark Chocolate bar.  Knowing this obsession, I knew she would love these brownies, even before I had ever made them.

How to eat:  It is best to eat these brownies upside down.  That way the salt touches your tongue first.

Citation: I found these on a blog (http://www.betsysbites.com/2011/05/omfg-brownies/)  of a blog (http://tastykitchen.com/recipes/desserts/salted-fudge-brownies/).  I changed the name but nothing else.  If I were to make them again (which I’m sure I will), I would add more salt into the brownie batter and not just on top.  You can find the recipe here: http://tastykitchen.com/recipes/desserts/salted-fudge-brownies/

The recipe says they need to be chilled, but I ate one while it was still warm with a glass of milk.  I was not disappointed.


Pretty Please Brownies with Cherries on Top

Originally posted Dec. 18, 2011

A few years ago, I was watching the food network and the pillsbury bake-off was on.  I knew right then that some day I wanted to enter this competition. This year was it.

Every Christmas my mom makes triple chocolate cake for all of our family friends. It is a super rich cake with a hint of almond. Half of the recipients confuse the almond flavoring for cherry. While cherries and almonds are quite different, they go amazingly together; and I decided that I would combine them for this competition.

My first attempt involved pillsbury pie crust, and it was an utter failure.

Then I decided I would combine an almond flavored brownie, an almond glaze, and cherry preserves.  Once I had that decided, I just needed to settle on the presentation of the dessert. Bite size brownies?  Cherries in between two layers of brownies?  Cherries below or above the almond glaze? My classmates were forced to test out a different version every couple of weeks.  Finally, I decided on a brownie cooked in a pie pan with the almond glaze topped by cherries; served like a cake.

I brought the dessert to a NCAA basketball championship watching party last spring and had people rate it and provide name suggestions. The runner up name was “cherry bomb,” and I’m planning on making another dessert that would more accurately depict that name (I’m picturing a cake pop with cherries in the middle).  “Pretty please brownies with cherries on top” won the prize for the perfect name!

The rules of the competition included that the recipe could never have been posted on a blog before, and you could not be a paid food blogger.  There are no advertisements on this blog, and up until this point, I have never posted the recipe.

Well, I lost.  Actually worse than lost, I never made the bake-off… Guess I should stop dreaming about what I would do with the million dollar prize.  So now as my Christmas present to you, I share with you my award winning (in my book only) pretty please brownies with cherries on top.

This is one of those recipe that is best after it has cooled and the flavors have had time to come together.

Pretty Please Brownies with Cherries on Top
Adapted from my Pillsbury Bake-off Recipe

Grease a 9×9 pie pan.  Line with parchment (important).

Prepare boxed brownie as instructed on the box.
Add:
1 tsp. almond extract
1/2 to 1 cup chocolate chips (if you are using a fudge brownie mix with chocolate chips already in it, then
1/2 a cup is probably enough)
Pour in pie pan and bake as instructed on box. (Under cook as much as you like, but make sure it doesn’t
come out as pudding.)

Meanwhile prepare icing:

1 cup powdered sugar
2 Tbsp. milk
1 tsp. almond extract

When brownie is done, allow to cool slightly, then flip onto a serving dish.  Drizzle with icing.

Finally, top with 3/4 of a jar of Pillsbury Cherry Preserves.

Allow to cool completely, then slice and serve!