Carrot Muffins with a Cream Cheese Surprise

A year and a half ago, my dear friend Alison gave me the most beautiful cookbook for my birthday. The Thomas Keller Bouchon Bakery. It has been my coffee table book every since. While I have dreams of making every recipe in the book, so far I am stuck on the carrot muffins, blueberry muffins, and lemon poppy seed muffins. They are both so delicious that I don’t have any reason to branch out.

Flash forward to this weekend. I had 8 oz. of cream cheese in my refrigerator that was about to expire, so I HAD to bake something with cream cheese. I’ve been on a whole wheat muffin kick recently, and King Arthur Flour had a recipe for Cream Cheese Carrot Cake Muffins. So! Then I had an idea to make the amazing Bouchon Bakery carrot muffins with a cream cheese filling while replacing some of the all purpose flour with white whole wheat flour.

These muffins require you to shred the carrots individually, but it makes them oh so delicious. The traditional recipe has an oat topping, but since I was adding the cream cheese filling, I skipped the topping.

Enjoy!

Bouchon Bakery Carrot Muffins
(ever-so slightly adapted)

1st:
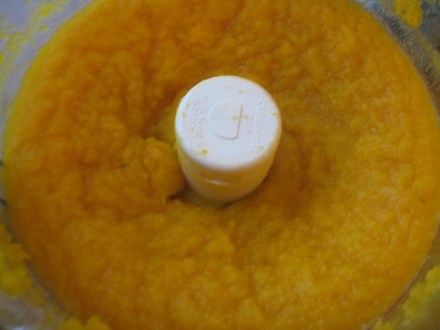
Shred 1 ¾ cup carrots
image

image
2nd:
Sift together (I don’t have a sifter, so I just stir with a fork):
90 grams whole wheat flour (5/8 cup + 1 tsp.)
90 grams all-purpose flour (5/8 cup + 1 tsp.)
¾ tsp. baking soda
¼ tsp. baking powder
1 tsp. cinnamon
1 tsp. salt

3rd:
In a separate bowl, whip with a fork:
1 cup + 2 tsp. sugar
½ cup + 2 Tbsp. vegetable oil
1 tsp. vanilla bean paste

Mix in:
1 egg

4th:
Gently fold the flour mixture into the liquid mixture. I did this in three parts.

5th:
Stir in the shredded carrots.

6th:
Cover and leave in the refrigerator overnight.

7th:

Preheat oven to 400 degrees. Mix 8 oz. cream cheese with 1/8 cup sugar.  Fill half of muffin cups with batter. Place a dollup of cream cheese mixture on top. Then cover with the rest of the batter.

Lower temperature to 325. Bake for 18-20 minutes


imageimageimageimage

Advertisement

Chocolate Ice Cream!

So, I said that I was going to start blogging again. That was over a month ago. So I better post something!

Two of my recent favorite things to make are yogurt and ice cream. Both involve heating up milk and are actually quite easy. I’ll start with a post for my favorite ice cream flavor so far – chocolate! It is actually quite strange that this is my favorite, since I never buy chocolate ice cream – whether it is from the an ice cream shop or the grocery. I’m more of a sweet cream or cake batter fan.

This ice cream though… is awesome. When it first comes out of the ice cream maker and before it is frozen, it is almost the consistency of a Wendy’s Frosty. And who doesn’t love a good Frosty?? The difference in this recipe from other ice cream recipes is that you actually whip up the cream in a mixer before adding the milk / chocolate base and putting it in the ice cream maker.

Now… it is key that you have an ice cream maker. I have a Cuisinart which was only about $50. I recommend you get one! Last year I moved from a town that had the best ice cream ever. Since I couldn’t find ice cream that good near me anymore (and yes, I live in NYC!), I purchased the ice cream maker. It is awesome and so fun.

This ice cream is best if you can make sure that the semi-sweet (or whatever type you use) chocolate doesn’t completely melt. On my bike ride today (because of course I was thinking of food), I realized that mint chocolate chips in this ice cream would be absolutely delicious. You could also try adding marshmallows and peanuts to do a rocky road!

Anyway… have an ice cream maker? Try this out and enjoy!

Recipe (adapted from http://straightfromthefarm.wordpress.com/2008/09/30/dark-chocolate-rosemary-ice-cream/ which I’ve made before and is also good).

¾ cup sugar
1 cup milk
¼ tsp. salt
1 tsp. vanilla paste or vanilla extract
¼ cup cocoa powder
3 egg yolks
2 ounces chocolate (semi-sweet, dark, milk chocolate chips, whatever!)
2 cups heavy cream
First:

Heat up the sugar, milk, salt, and vanilla until steaming. Take off the heat and add the cocoa.

photo 1

Separate your eggs (yolks separated from whites – do what you want with the whites!). Slightly beat. Then slowly add about ¼ cup of the chocolate/milk mixture to the eggs – while whisking them. This helps keep the eggs from cooking. Next, add the egg mixture to the rest of the chocolate. Heat up the mixture until thicker (but before it boils).

photo 2

Strain the chocolate mixture to remove any cooked eggs (it happens!) into a bowl that has been chilled.

photo 3

Add the chocolate and stir it in so it melts a bit.


Chill the bowl for 2 hours – I usually do it over night.

photo 4

Now… here is the key. Normally, you take the bowl out of the ice cream and add it to the ice cream maker immediately. (I accidentally did this last night). FIRST – you need to whip up the cream (2 cups) until fluffy.

Fold in the chocolate mixture.

photo 1

Now… add it to the ice cream maker, until… you have ice cream!

Eat immediately if you can or freeze until ready!

photo 3

Chocolate sweet rolls

I’ve been wanting to share this recipe for over a month now, but I keep messing up the icing. By messing up, I mean it doesn’t look pretty. It still tastes ridiculously amazing.

As with most things in life, when I come up with a genius idea, I then realize that someone else has already made it. I love cinnamon rolls, and I love making them. They are so good that I don’t think they should be restricted just to pre-noon hours. Why not make them for a dinner dessert? And why not add chocolate to them?

That was my genius idea. Chocolate cinnamon rolls. Just to check, I googled it. What immediately popped up? Pioneer woman cooks chocolate chip cookie sweet rolls. I’d made her regular cinnamon rolls before, and they were awesome, so I knew this recipe would be no different.

The cool thing about her cinnamon roll recipes, is that 1/2 of it is make ahead. You can make the dough, let it rise, and then stick it in the fridge for up to 3 days before rolling out and then baking. If you don’t love waking up at 5am to make brunch, or if you are planning on making them for dessert, you can make 1/2 of them the night before!

As I’ve been inclined to do recently, I’ll just refer you to the link above and then give you a few hints and pictures:

1. After heating up the milk, you need to let it cool to warm before adding the yeast. She tells you to do this, but sometimes when I’m in a hurry, I skip over the directions. I did that one night and the dough never rose.

2. When making the icing, follow her instructions. Do not add all the ingredients at once and expect it all to come together. You’ll end up with clumps in your icing. If you don’t add enough powdered sugar, you’ll get an icing like the one below. Regardless, pour it on top. Cream cheese, butter, and sugar always taste good.

3. The chocolate really stands out, so I’d splurge and get some real good chocolate to make them extra delicious.

4. The regular cinnamon rolls are also awesome. When visiting my brother and sister in law a couple weeks ago, I made both in one weekend. I’ll let my brother tell you how many he ate for breakfast. It was… impressive.

5. Half a batch will yield about 30+ cinnamon / sweet rolls. That is usually enough for whatever I’m baking for.

Try them! Have fun with it! The base is awesome, so just go crazy with the toppings.

20130303-144633.jpg

20130303-144720.jpg

20130303-144731.jpg

20130303-144739.jpg

I’m back!

Hello! Sorry I have become so delinquent with posting. I just found an ap for my iPad that will allow me to post pictures, so I am hoping I will start posting more again! I end up taking the train into the city most weekends, so it will be the perfect time to share the latest with you.  Since it has been so long, I thought I would just post an update with some of the things I’ve made since I moved to New York and mainly recently.

For labor day fireworks at west point, I made some ice cream sandwiches from the smitten kitchen blog. I picked up some cake batter ice cream from one of the five ice cream shops in my little town to give it a little bit of a different twist. smitten kitchen ice cream sandwiches

20130126-161911.jpg

Izzy loved them:

20130126-165428.jpg

I found an awesome grocery store just 20 minutes from me (everything is 20 to 30 min. away), and they have the best fruit in the summer! I went on a blueberry kick and made a bunch of blueberry yumminess, including these blueberry crumb bars, again from smitten kitchen.

20130126-162353.jpg

After hosting dinner parties at least once a month in Nashville (if not more), by November I had made enough friends to have one in new york! One of the desserts I served was a cranberry apple pie from cooks illustrated.

20130126-162747.jpg

20130126-162757.jpg

20130126-162809.jpg

In December, my good friends Raven and Joe hosted a holiday mad men party. In honor of the theme, I made a Christmas jello mold. One person tried it at the party. I took it into work and it took almost a week for it to disappear (which is impressive given that most things put down in the lounge are gone in less than 15 min). I guess jello isn’t so popular anymore.

20130126-163149.jpg

If you are looking for a delicious but easy dessert, try a molten chocolate cake. The recipe called for 13 minutes in the oven. I’d recommend reducing that to 12… Just to increase the gooeyness. molten chocolate cake

20130126-163424.jpg

20130126-163436.jpg

20130126-163445.jpg

Finally, while not meant to be a dessert, I thought I would share that I recently competed in another food competition. As you may remember, the last time I entered one, I lost miserably. (See my blog post on it.) This one ended in the same result. Maybe the third time will be the charm. I made a lemon, strawberry pizza. It was supposed to have fresh basil, but I bought bay leaves by accident…

20130126-164212.jpg

The winner made a pear, Gorgonzola, walnut pizza:

20130126-164315.jpg

Pumpkin Puree

Originally posted October 24, 2011

Homemade Pumpkin Puree!  Easier than pumpkin pie!
I’m never going back to canned pumpkin again, and I recommend that you test it out.

I’ve already made pumpkin bread, and I plan on making pumpkin smoothies, pumpkin cupcakes, pumpkin soup, pumpkin…  I’m out of ideas – please let me know if you have any!

I don’t have any good stories for this blog post – I’ll blame that on the fact that I’ve been spending too many hours re-writing my job market paper and writing cover letters.

Here are the steps for pureeing pumpkin!

Get some pie pumpkins.

Pre-heat the oven to 350 degrees.  Slice up one pumpkin and remove the seeds.


Place slices on a cookie sheet.  Bake for 45 minutes.


Allow to cool, and then peel the skin off of each slice.


Put in a food processor and blend!


You are done!  (You can also drain using a strainer or a cheesecloth, but I didn’t see much difference after I drained the pumpkin for an hour).

Strawberry Muffins

Originally posted May 22, 2011

I’m obsessed with this one recipe for blueberry muffins.  I make them once a year when blueberries come out in full
swing.  Unfortunately (or actually fortunately!), it is strawberry season right now, so strawberries are super
cheap at the store.  I wanted to make SOMETHING with strawberries, so why not make the blueberry muffins into
strawberry!  If you are looking for something to do with strawberries, I recommend these.  Or, if you buy some
blueberries, try them out too!  You could even try a blueberry, strawberry combo muffin.  I can’t decide if that
would be tasty or not…

Photos: The cicadas are out like crazy right now!  For those that don’t live in Nashville, apparently this type of cicada
invades the city every 13 years.  They attach to anything they can – especially the house or the trees.  I’ve only had one try and get on me, and I was able to quickly swat it away, but the noise they make is deafening.  However, I have been reading that the best way to photograph food is in the natural sunlight.  While I usually bake a night, this morning was an exception when I was testing out the strawberry muffins.  I risked a cicada attack of my strawberries to run outside and take a few shots, and the pictures came out so much better this time!   Plus, I’m happy to report that the strawberry muffins turned out cicada free!

Citation: Adapted from Joanne Fluke’s “Blueberry Muffin Mystery” recipe for blueberry muffins.  I substituted blueberries for strawberries, and because they didn’t have any strawberry pie filling at the Trader Joe’s, I used strawberry jam.  In the future, I might add a little more baking powder to get them to rise up a bit more.

Blueberry Strawberry Muffins

¾ cup melted butter
1 cup sugar
2 beaten eggs
2 tsp. baking powder
½ tsp. salt
1 cup fresh or frozen blueberries strawberries (if frozen, do not need to thaw)
½ cup pie filling (or substitute with strawberry jam, if that’s what you can find!)
2 cups plus 1 Tbsp. flour
½ cup milk
Topping:
½ cup sugar
1/3 cup flour
¼ cup softened butter
1.    Put 1 Tb. Of flour in a bag with the berries and gently shake up.  Set aside
2. Melt the butter and mix in sugar
3. Add the eggs, baking powder, and salt
4.    Add ½ of flour and 1/2 of milk to batter, and mix in.  Repeat with the rest of the flour and milk.
5.    Add ½ cup of berry pie filling (or jam) and mix in.
6.    Carefully stir in the berries.
7.    Add to muffin tins.  If more batter remains, fill a loaf pan with the batter.
8.   Crumb Topping: Mix the sugar and flour in a small bowl.  Cut in butter.
10. Sprinkle topping on muffins.
11. Bake at 375 for 25 to 30 minutes.  (15 minutes if making mini muffins)

Strawberry Shortcake Trifle

Originally posted on June 13, 2011

Nothing says summer like strawberries and whipped cream.

I made pound cake last week (see Nina’s Pound Cake).  I took some to school for friends, but I still had about half of it left over, so I popped it in the freezer.  My mom gave me a trifle dish a few years ago which I have used to serve fruit salad on numerous occasions, but I had never used it for it’s real purpose: a trifle.  Since I already had the pound cake, this was the perfect opportunity.  I searched around the internet and found a good recipe for cream that wouldn’t liquefy in the fridge.

The whole process is super easy.

Cut up some strawberries.  Sprinkle with Sugar.

Cut up sound pound cake (homemade or store bought)

3.     Beat together 1 cup of heavy cream, 8 oz. of cream cheese, and 2 tsp. of vanilla.  In the future, I’d probably add a little sugar.

4.   Assemble:
Place a layer of pound cake on the bottom of your trifle dish.

Add a layer of whipped cream.


Top of with strawberries.


Repeat.

You’re done!

Citation: I had the idea for the whipped cream / cream cheese mixture from here: http://www.foodnetwork.com/recipes/sunny-anderson/patriotic-berry-trifle-recipe/index.html

Raspberry Squares

I’m testing out a new blog!  I actually set this domain up prior to starting my old blog, so I’m trying it again!  I’m starting with this old post really because I wanted to pin in on pinterest for some side/dessert ideas I was having about a cookout.

I’m copying and pasting the old post here:

Wednesday, August 10, 2011

Golden Raspberries.  Ever heard of them?  I had not until last Saturday.  Mixed in with red raspberries, I thought they would be perfect for the cobbler I wanted to make on Sunday night.

Next step: find the perfect cobbler recipe.  I looked up all of my favorite food blogs and pulled out my cookbooks but nothing stood out.  I had something in mind but couldn’t put my finger on it.  Finally, I opened up the Waldemar Cookbook to look for the peach cobbler recipe that I remembered eating at camp.  I couldn’t find it, but what I did find was the cherry squares recipe.  That was it!  That’s what I wanted.  I would simply substitute the cherries with some raspberries, and replace the cherry sauce with some fresh whipped cream.  Done and Done.

Camp Waldemar… where I spent a month every summer for 7 years playing soccer, basketball, golf, tennis, volleyball; shooting archery and riflery; killing myself in war canoe (an 11 person wooden boat); chewing ice instead of drinking water; swimming in the Guadalupe; oh, and eating incredibly well.  I recommend the cookbook, and if you buy it, I’ll tell you all of my favorites (everything except the cheese soufflé).

This recipe is so easy, it’s embarrassing.  It is delicious with raspberries, and my dad loves it with canned cherries.  You really can’t see the golden raspberries once it is cooked, so I’d just stick with whatever is cheaper.

Check out the cookbook for the cherry sauce that is so delicious you will want to eat it by the spoonful.

Raspberry Squares (adopted from Camp Waldemar Cherry Squares)

Heat oven to 375 degrees

Stir together:
3 pints raspberries
2 tablespoons sugar
1 tablespoon lemon juice

Add all of these ingredients and pop in the refrigerator for 30 minutes.

Crust / Topping
1 1/2 cup flour
1 cup sugar
1/2 cup butter

Sift together flour and sugar.  I do not own a sifter, so I just stir it with a fork.  Cut in 1 stick of unsalted butter.  Press 1/2 of crust onto the bottom of a square 8×8 or 9×9 inch pan.
Place the raspberries on top.  Sprinkle the rest of the crust on top.
Bake in 375 degree oven for about 45 min. until bubbling and the crust is a golden color (check out the pictures).